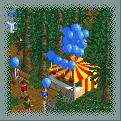
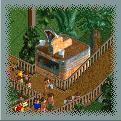
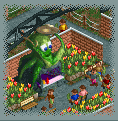
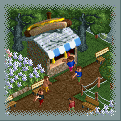
 Balloon Stall
Novelties.
Fixed Size Stall: 1Wx1Dx4H, Installation Cost: $200
Balloon Stall
Novelties.
Fixed Size Stall: 1Wx1Dx4H, Installation Cost: $200
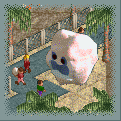
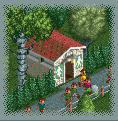 Bathroom
Satisfies Bathroom.
Fixed Size Stall: 1Wx1Dx2H, Installation Cost: $200
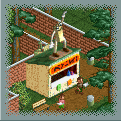
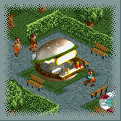 Burger Bar
Satisfies Hunger.
Fixed Size Stall: 1Wx1Dx2H, Installation Cost: $300
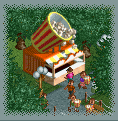
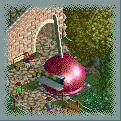 Candy Apple Stand
Satisfies Hunger.
Fixed Size Stall: 1Wx1Dx5H, Installation Cost: $245
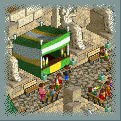
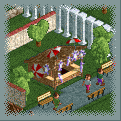
 Coffee Shop
Satisfies Thirst.
Fixed Size Stall: 1Wx1Dx3H, Installation Cost: $250
 Cotton Candy Stall
Satisfies Hunger.
Fixed Size Stall: 1Wx1Dx3H, Installation Cost: $250
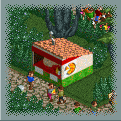
 Donut Shop
Satisfies Hunger.
Fixed Size Stall: 1Wx1Dx4H, Installation Cost: $262
 Drink Stall
Satisfies Thirst.
Fixed Size Stall: 1Wx1Dx3H, Installation Cost: $225
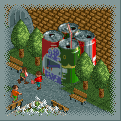
 Exotic Sea-Food Stall
Satisfies Hunger.
Fixed Size Stall: 1Wx1Dx4H, Installation Cost: $325
 Fried Chicken Stall
Satisfies Hunger.
Fixed Size Stall: 1Wx1Dx4H, Installation Cost: $260
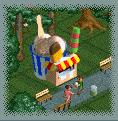
 Fries Stall
Satisfies Hunger.
Fixed Size Stall: 1Wx1Dx5H, Installation Cost: $300
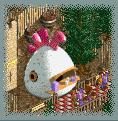
 Hat Stall
Novelties.
Fixed Size Stall: 1Wx1Dx3H, Installation Cost: $250
 Hot Dog Stall
Satisfies Hunger.
Fixed Size Stall: 1Wx1Dx3H, Installation Cost: $290
 Ice Cream Stall
Satisfies Hunger.
Fixed Size Stall: 1Wx1Dx3H, Installation Cost: $250
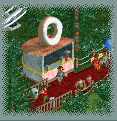
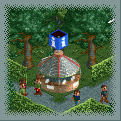 Information Kiosk
Novelties.
Fixed Size Stall: 1Wx1Dx3H, Installation Cost: $250 ~ (Four-sided building)
 Lemonade Stall
Satisfies Thirst.
Fixed Size Stall: 1Wx1Dx3H, Installation Cost: $210
 Pizza Stall
Satisfies Hunger.
Fixed Size Stall: 1Wx1Dx3H, Installation Cost: $275
 Popcorn Stall
Satisfies Hunger.
Fixed Size Stall: 1Wx1Dx3H, Installation Cost: $250
 Souvenir Stall
Novelties.
Fixed Size Stall: 1Wx1Dx3H, Installation Cost: $210
 T-Shirt Stall
Novelties.
Fixed Size Stall: 1Wx1Dx2H, Installation Cost: $255
Because Shops/Stalls are only one tile in width and depth, initially at least one corner must rest directly on a Land surface. Lowering the land after the the shop/stall has been placed will cause supports to appear beneath the shop/stall. It should be noted that, while paths/rides/shops/stalls have a maximum allowable support height unit limit above Land, the support structure graphics are for player esthetic satisfaction only. The game doesn't recognize supports as physically existing, and will remove the graphic if it is in the way of another object.
The classifications of Shops & Stalls are:
Bathroom = Bathroom
Drink Stall = Coffee Shop; Drink Stall; Lemonade Stall
Food Stall = Burger Bar; Candy Apple Stand; Cotton Candy Stall; Donut Shop; Exotic Sea-Food Stall; Fried Chicken Stall; Fries Stall; Hot Dog Stall; Ice Cream Stall; Pizza Stall; Popcorn Stall
Novelty Shop = Balloon Stall; Hat Stall; Information Kiosk; Souvenir Stall; T-Shirt Stall
Shops & Stalls all have a running cost of $49.60 per hour (so consider closing them when they are not likely to be patronized, such as under certain weather conditions). Guests ignore closed shops they pass, and will never specificically consider heading towards one. The price you set for the sale of items will determine if the shop turns a profit (too low and your open shop doesn't cover operating costs, but if too high a guest will refuse to make a purchase and his Happiness will drop slightly).
Bear in mind that guests enter the park with only so much money, and this can never be increased. Guests adjust how much they are willing to pay for items depending on whether the temperature is currently within one of the three temperature ranges of Cold, Medium, or Hot. Remember that guests will buy more Drink/Food, but they will only make one Novelty item purchase (except for balloon replacement). The tables below show the lowest maximum price that all guests will be willing to pay at a shop/stall without generating complaints. Guests may be willingly pay slightly more as their Happiness increases.
| Drink \ Temperature | Cold | Medium | Hot |
| Coffee | $2.00 | $1.10 | $1.50 |
| Drinks | $1.00 | $1.20 | $2.00 |
| Lemonade | $1.00 | $1.10 | $2.10 |
| Food \ Temperature | Cold | Medium | Hot |
| Burgers | $2.20 | $1.90 | $1.90 |
| Candy Apples | $1.00 | $1.00 | $1.00 |
| Cotton Candy | $0.60 | $0.90 | $0.90 |
| Donuts | $1.00 | $0.80 | $0.70 |
| Fried Chicken | $2.20 | $1.90 | $1.90 |
| Fries | $1.80 | $1.60 | $1.60 |
| Hot Dogs | $2.00 | $1.70 | $1.70 |
| Ice Creams | * | $1.00 | $1.50 |
| Pizza | $2.50 | $2.10 | $2.10 |
| Popcorn | $1.10 | $1.30 | $1.30 |
| Tentacles | $1.80 | $2.20 | $2.00 |
| Novelty \ Temperature | Cold | Medium | Hot |
| Balloons | $1.40 | $1.40 | $1.40 |
| Cuddly Toys | $3.00 | $3.00 | $3.00 |
| Hats | $2.40 | $2.70 | $3.20 |
| On-Ride Photo (Inverted Steel RC) | $3.00 | $3.00 | $3.00 |
| On-Ride Photo (Non-Inverted Steel RC) | $3.00 | $3.00 | $3.00 |
| On-Ride Photo (Water Ride) | $3.00 | $3.00 | $3.00 |
| On-Ride Photo (Wooden RC) | $3.00 | $3.00 | $3.00 |
| Park Maps | $0.80 | $0.70 | $0.70 |
| T-Shirts | $3.70 | $3.70 | $3.70 |
| Umbrellas | $5.00* | $3.50* | $2.50* |
If you set all your pricing to the lowest maximum amount guests are ever willing to pay for an item, then you don't have to worry about
Bathroom usage is unique, in that pricing is not tied to temperature, and that guests may willingly pay slightly more as their Bathroom urge increases. For the most part, you can set the lowest maximum bathroom rent at $0.20 without generating any guest complaints.
Shops/Stalls do not use a "Queueing Line". However, the shops "front" side (or one of the four service windows in the case of the Information Kiosk...although you should still try to place the "front" window towards your heaviest traffic area) needs to touch a footpath square, so that guests can access the shop. The key to success in the park food business is variety {m}. Scenery has zero affect on patronage or the price a guest is willing to pay.
You want the Bathroom convenient, visible, and easy to find - so it's a good idea to locate a Bathroom close to food service areas {m}. Unlike all other shops/stalls, guests momentarily physically enter the Bathroom building (there doesn't appear to be a capacity limit). The manual suggests that Guests may also need to use a Bathroom after a particularly intense and/or nauseas ride {m}. This is not true, as the only time a guest will seek out a Bathroom is when they need to reduce their bathroom stat. Bathrooms will not reduce Nausea, collect litter, or perform any other function. Only when the admission price is too high will they refuse to enter (guests without money will need at least one Bathroom to be free, but most guests with money will pay $0.20 without complaint).
Guests will not buy a food or drink item if they currently have either an unconsumed food or drink item in their inventory. Food Stalls affect a guests "Hunger", Drink Stalls affect a guests "Thirst", and Bathroom reduces a guests "Bathroom". Spread stalls (whether by themselves or as part of a "food court") around the park so that your guests do not need to go far to fulfill a particular urge {m}. Note that although a guest with a higher Bathroom stat will be willing to pay slightly more to use a bathroom (to a point), an increasing Bathroom stat drives the guests Happiness stat down.
The manual and strategy guide leave a lot of hints about placing food stalls near rides: ~Very few guests come off an intense ride looking for a meal {m}. ~The combination of food and thrilling rides is the primary cause of guests feeling sick {m}. ~Even if nauseaus, guests will still eat {s}. ~Consider locating Food Stalls far from intense rides {m}, but feel free to place Food Stalls near the exits of mild rides {s}. What they are alluding to is that while rides do not increase Hunger, hungry riders will seek food even if they are Nauseus (leading to increased nausea or vomiting). Drinking a drink lowers nausea while the drink is being consumed, which is why drink stalls for thirsty guests are suggested to be placed near the exits of Nauseas rides (and guests may even patronize them before entering the ride, giving them more nausea tolerance). Eating food increases nausea while the food is being consumed, which is why food stalls for hungry guests are suggested to be placed away from the exits of Nauseas rides (to give the Nausea stat time to lower on its own somewhat before the guest arrives at the food stall). Since guests can enter rides before they have finished consuming their food and will continue eating after they exit, food stalls selling food that takes the longest time to consume (and thus increase nausea most) should be kept the farthest distance from a nauseas ride.
When a guest becomes sufficiently Bathroom/Hungry/Thristy and desires to satisfy his need, he will choose the closest (compass direction) applicable bathroom/drink/food stall from the location he is currently standing (guests have no food/drink type preference), and head directly for it (regardless of how convoluted the footpath reaching it is), ignoring any other applicable stall he might pass on his way. Once a guest arrives he still might not use it if he considers the price too high or conditions not correct (such as weather), and will then look for something else based on his new location (such as perhaps one of the stalls he ignored while making a
Guests will not purchase from an Ice Cream Stall if the temperature is Cold (51 degrees and lower).
Hot (70 degrees and higher) temperatures will increase Thirst faster than normal (so consider building more drink stalls in hotter climates). The manual suggests that drink stalls are more popular when placed near food stalls that sell
Here are the ranked Thirst reduction benefits for drinks:
Lemonade = 115
Drinks = 100
Coffee = 90
Here are the ranked Hunger reduction benefits for foods:
Fried Chicken = 170
Burgers = 150
Pizza = 150
Hot Dogs = 133
Fries = 120
Tentacles = 120
Donuts = 80
Popcorn = 75
Ice Creams = 60
Candy Apples = 50
Cotton Candy = 50
Guests begin eating once they purchase their food {m}, and the guests carried items window will show that they have the food/drink item in their possession. The manual states that many guests prefer to sit when they eat {m}. The actual formula is if the guest is consuming an uneaten/undrunk food/drink item, and they pass an undamaged bench (they won't seek out benches), and their Happiness is 127 or lesser OR their Hunger (not thirst) is 128 or greater, the guest will choose to sit on the bench to consume their food/drink item. Longer consumption times affect the amount of time a guest will remain sitting while eating/drinking (possibly requiring more benches). More significantly, longer eating/drinking times mean that a walking guest will travel farther before their container becomes empty and ready to be thrown away. This means that for litter producing items with longer consumption times it may be prudent to place litter bins further away from the stall.
Making little
While guests will never accidently drop a food or drink, most Food and all Drink stalls generate litter{m}. The exceptions are: Candy Apple Stand; Cotton Candy Stall; Donut Shop; Exotic Sea-Food Stall; Hot Dog Stall; and Ice Cream Stall. The types of litter generated by the other stalls (and they each have their own litter icon) are: Burgers = Empty Burger Box; Coffee = Empty Cup; Drinks = Empty Can; Fried Chicken = Empty Box; and Lemonade = Empty Bottle. Fries, Pizza and Popcorn are unique, in that all three generate the same litter icon called "Rubbish". Since a guest can only carry one type of litter of the same type, if the guest is already carrying Rubbish then the Rubbish from the different food item is disregarded. If a guest carrying an empty food/drink container passes an undamaged empty litter bin (they won't seek out litter bins), they will place the litter in the bin rather than tossing their litter onto the footpath (but a Handyman will still be required to clean up the occasional vomit).
Happy guests are more likely to buy Souveniers and T-shirts, so place them near the Exits of enjoyable rides to maximize profitability {s}. Guests will not buy a Balloon, Cuddly Toy, Hat,
Supplying park maps helps to greatly decrease the number of guests who get lost {m}. If you don't yet have the Information Kiosk (the only place maps are sold), it is a good idea to set Research on "Shops & Stalls" to Maximum, and turn Off research to all other categories, until you get the Kiosk. Although guests can access an information kiosk from four sides, do not complete a full footpath circle around a kiosk, as it confuses guest path finding ability. Unless rain is falling, most guests will purchase a map before an umbrella. Park maps provide guests with knowledge of the existance of all the rides in the park, plus the general direction from where they are standing to reach them (similar to the general direction knowledge guests have to find the park exit). Guests will also now have a four times higher probability of deciding to head for a specific ride, rather than just wandering the park. The manual suggests that guests will sometimes drop their park maps {s}, but this is not true (and the maps won't even dissapear if you demolish all the kiosks).
During rainfall guests will refuse to shop at the Balloon Stall, Cotton Candy Stall, or Ice Cream Stall, and will run directly to an Information Kiosk or a Souvenir Stall to purchase an Umbrella. If umbrellas are available for sale, your guests become much less uncomfortable (and therefore less unhappy) in the rain {m}. Sleazy park managers in wet scenarios can take advantage of this by always keeping the Umbrella price extremely high. Although guests will thus be unlikely to buy an umbrella when it is not raining, when the rain is falling the hoards of guests running to the stall will willingly pay the high price.
Guests will release a balloon they are visibly holding (not just possessing) when a Scenario is won, the guest starts to drown, or randomly throughout the game (especially when they change what they are visibly holding). Released balloons will be removed from the guests inventory window, so the guest will have an opportunity to purchase a replacement. Released balloons, like ducks, fly up and away out of the game map. Some released balloons will pop on their own, but most released balloons can be manually popped if you click on them. Released balloons are treated by the game as a miscellaneous graphic (like the ducks are), and the game has a hard limit of only 300 such simultaneous graphics.
Tip: You can use the large selection of food stalls to your advantage to convince arriving guests to travel to certain sections of your park. For example, you could place four different unique food stalls so that each is in one corner of your park. You then run a "Coupons for Free Food or Drink" marketing campaign for whichever food stall is in the part of your park where you want the newly arriving guests to visit.